The Cutest River Otter Collage!
PreK students have started their big animal unit. It’s a unit that spans four weeks and four different continents/habitats. They begin in North America and will learn about some specific animals from our continent: the Northern Cardinal, Raccoon, Beaver, and the Bald Eagle. We’ve created various projects over the years but last year I came up with this gem- the cutest river otter you ever did see!
River Otters can be found in the Pacific Northwest, across Canada, into Alaska, and even through some mid-Atlantic states down to the Gulf Coast. They live on both land and in the water. These mammals eat easily accessible small prey: snails, crayfish, fish, mussels, clams, small amphibians, and even small turtles! They have a thick short fur and live eight to nine years in the wild, over twenty in captivity . A group of otters is called a raft. Let’s get started!

MATERIALS:
+ 12x18 white paper
+ pencil
+ sharpie
+ watercolor
+ crayons in neutral colors
+ otter worksheet
+ scissors
+ glue
+ scrap paper


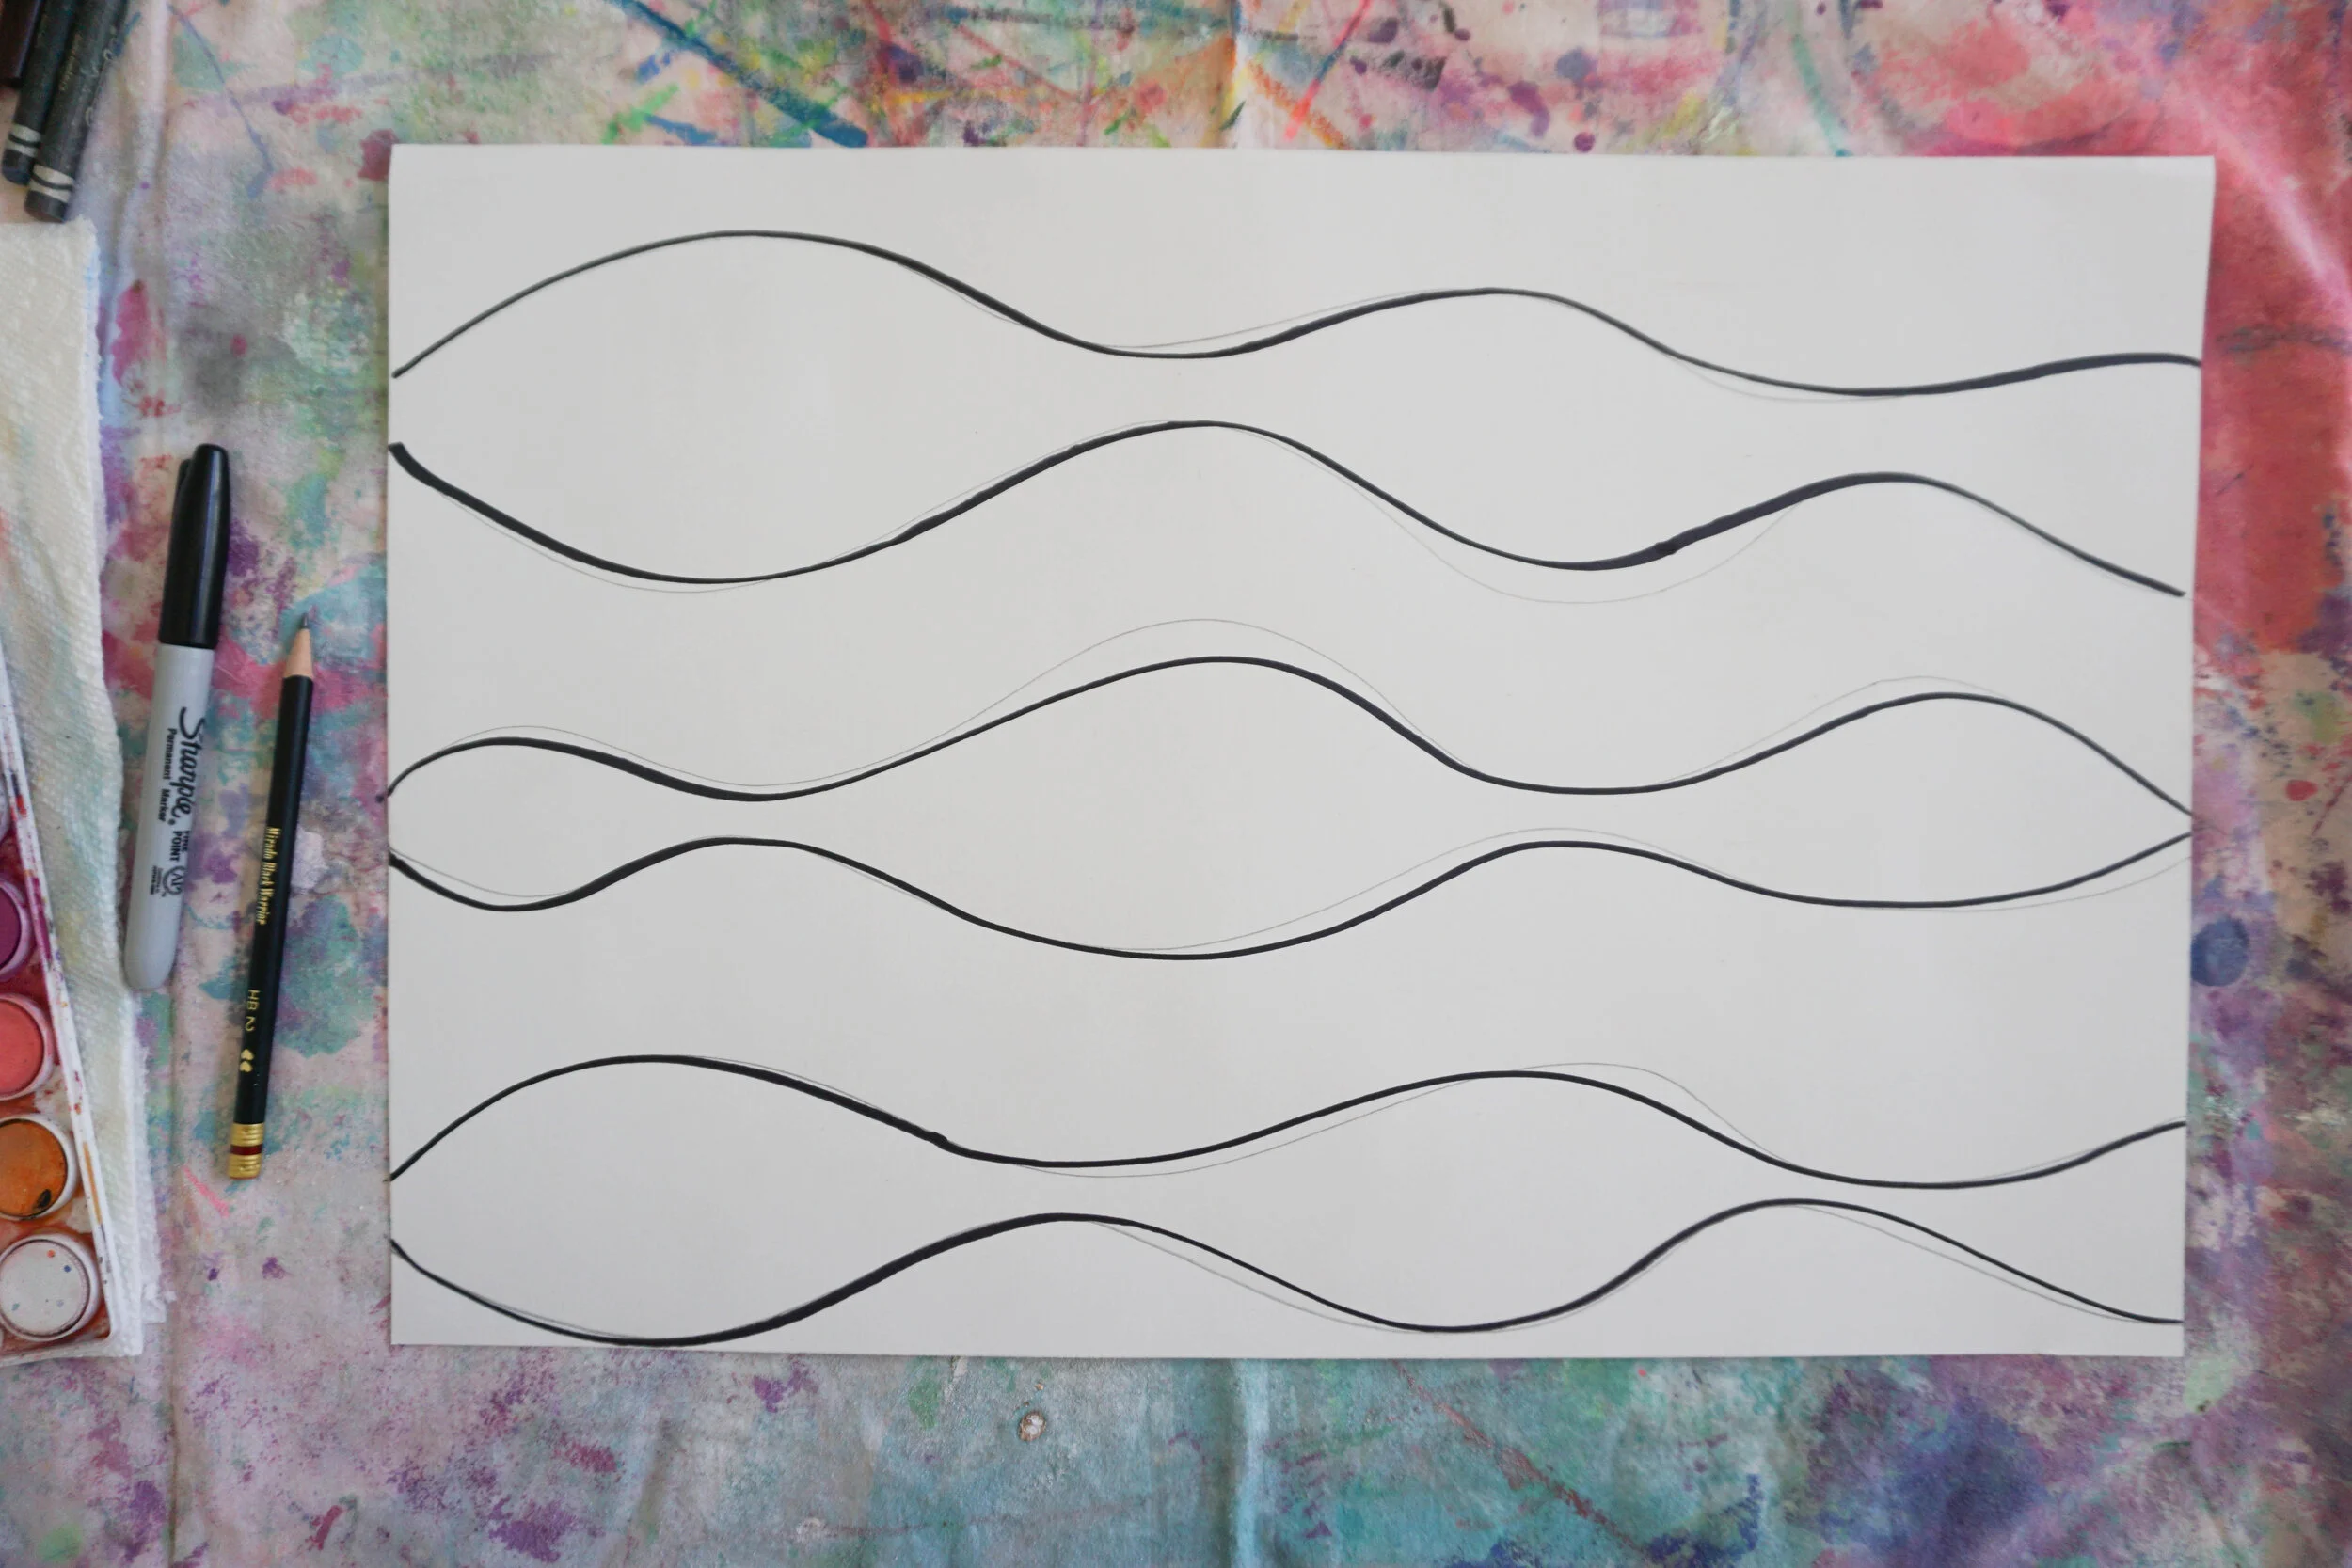

For our first step we’re going to create our seaweed background. I drew two slightly curvy lines close together to create one strip of seaweed. I traced it with sharpie to make it stand out. I repeated this two more times so that I ended up with three strands of seaweed. To make it more interesting I created texture by adding some line details- there is no right or wrong way to do this.

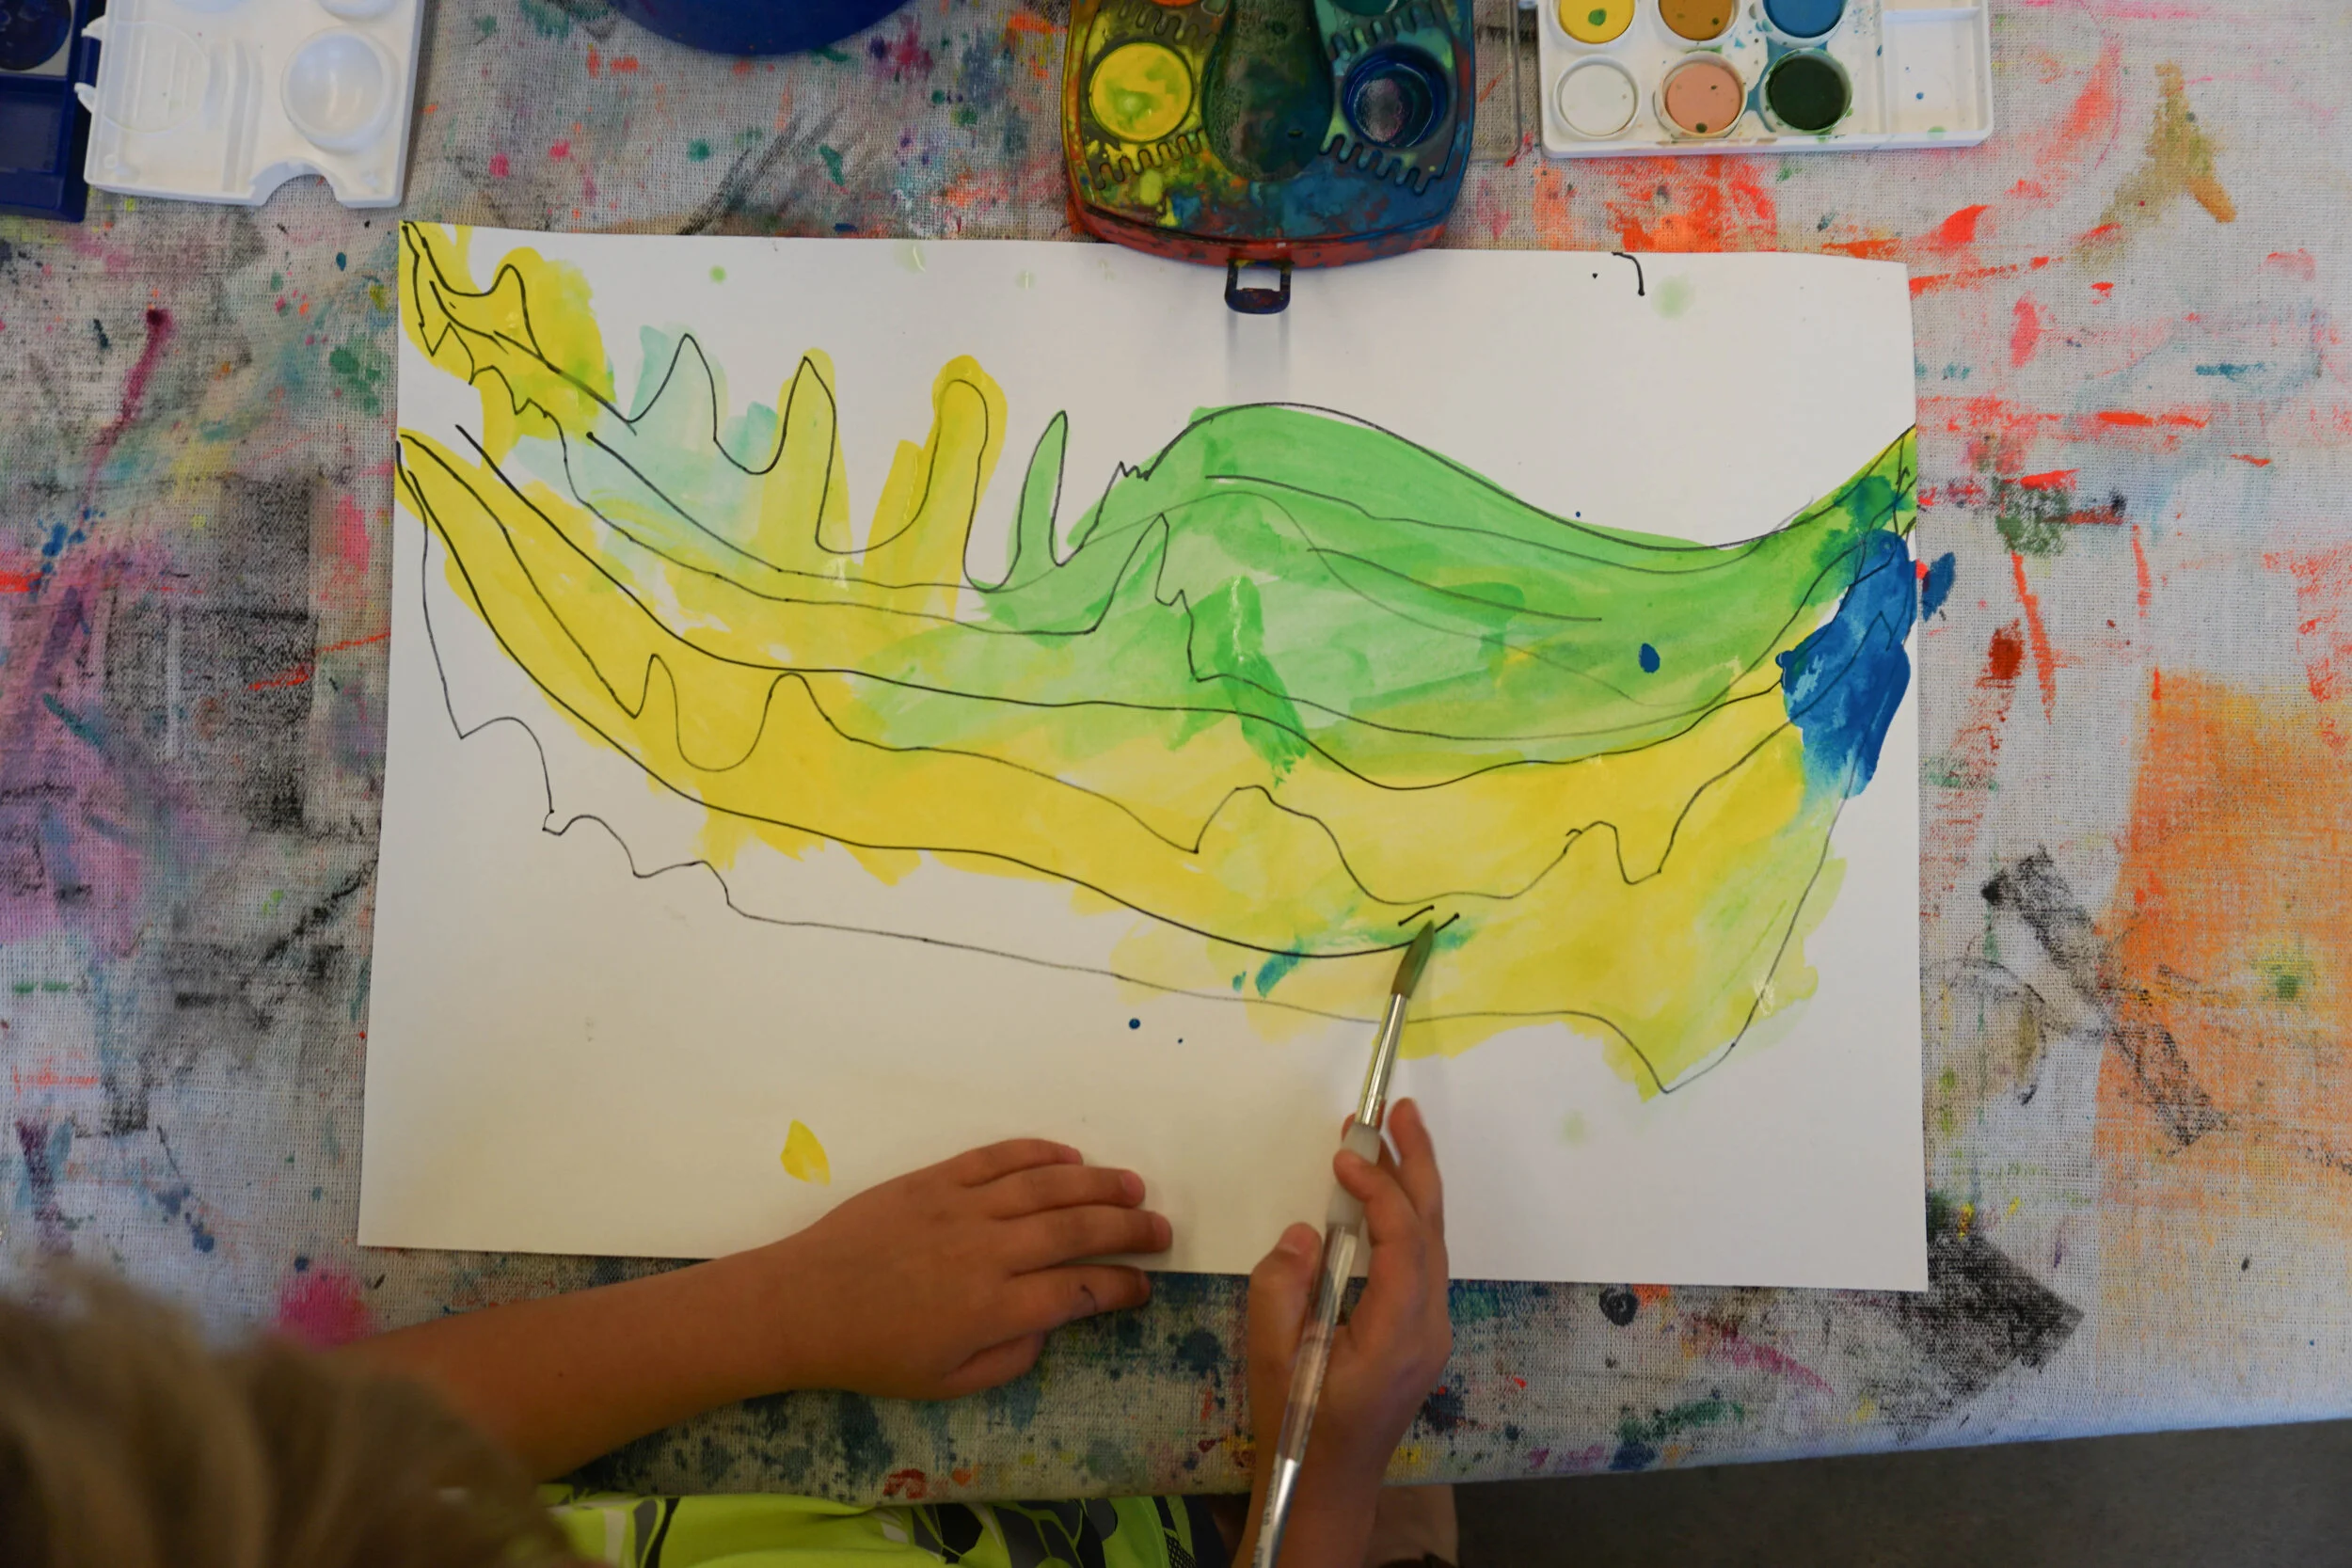
Use your green watercolors to paint in the strands of seaweed only. You can see that some artists added blue or yellow to change the shade of green. Color mixing adds to the idea of realism. When we look at plants, or water, or the sky we see a mix of colors not one solid color. Go ahead, mix it up.


Now let’s get to the otter! I hand out copies of the otter body that have been copied onto a tan or medium brown construction paper. Use the sharpie to create fur and then use a mix of neutral colors (browns, blacks, tans, whites, greys) to color in the otter. Don’t worry about staying inside the lines because we’ll be cutting each piece out. We also added yellows, blues, and greens because the water that our otter is floating in wouldn’t be clear and would reflect on their fur coat. However, the otter should still be mostly neutral colored!

Once it’s colored, cut that cutie out! You’ll have one head (watch those ears!), a belly, two long legs, and two short legs. Arrange the pieces to form the otter floating in the seaweed- little legs go at the bottom! Glue everything in place with just enough glue. These are small pieces of paper and not a house. Don’t use too much!


Lastly, use your scrap paper and create something for the otter to eat. I used a scrap piece of blue paper, drew a shell, cut it out, and glued it in the otters hands. Now it can enjoy a meal. What a fun, super cute project! Enjoy and happy making!
